
There’s something magical about sheet pan meals, isn’t there? The simplicity, the ease of cleanup, and the delightful mingling of flavors all come together to create a dish that brings comfort and satisfaction. One particular weeknight, feeling the buzz of a busy day weigh on my shoulders, I was craving something quick, nutritious, and, most importantly, pleasing to my family’s discerning taste buds. Thus, my mission began to whip up these delicious Sheet Pan Chicken Pitas.
As I cut through the vibrant bell peppers—red, green, and yellow, they reminded me of a summer garden, bursting with life and color. My kids entered the kitchen, their curiosity piqued by the enticing scents wafting through the air. I could almost hear their little tummies rumbling in anticipation. In under an hour, I would have a meal that was not only satisfying but unforgettably delicious—and certainly family-friendly!
So, grab your apron, and let’s dive into the experience of making these Sheet Pan Chicken Pitas that promise to deliver a healthy dose of joy along with protein and flavor.
Recipe Timing
- Prep Duration: 10 minutes
- Active Cooking: 25 minutes
- Total Duration: 35 minutes
- Portion Size: Serves 4
- Complexity: Simple
Nutritional Recipe
- Calories per portion: 350 kcal
- Protein: 30 grams
- Carbs: 34 grams
- Fats: 10 grams
- Fiber: 4 grams
- Sugars: 3 grams
- Sodium: 550 mg
Why You’ll Love This Sheet Pan Chicken Pitas | Family-Friendly High Protein
These Sheet Pan Chicken Pitas are a game-changer! With juicy chicken and colorful bell peppers, seasoned to perfection with aromatic herbs, they’re not only packed with flavor but also rich in protein, making them a fantastic choice for busy families. The best part? They take minimal time to prep and require just one pan—making cleanup a breeze. Plus, with an array of flavors and textures, it’s a meal that pleases every palate.
The Complete Cooking Journey
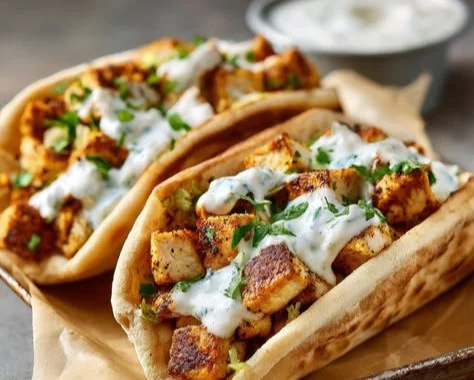
Imagine this: as the chicken roasts alongside the bell peppers in the oven, the aromas begin to dance around you, mingling with gentle notes of oregano, thyme, and parsley. You can practically taste the anticipation. It’s a wonderful journey that ends with a delightful assembly of tender chicken and veggies tucked inside warm pita bread and drizzled with herbed ranch dressing. This is not just dinner—it’s a celebration of flavors!
Ingredients:
- 1 pound chicken breast
- 2 bell peppers (red, green, yellow)
- 2 tablespoons olive oil
- 1 teaspoon herbs (such as oregano, thyme, and parsley)
- ½ cup ranch dressing
- 4 pita breads
- Salt, to taste
- Pepper, to taste
Method:
Step 1: Preheat the Oven
Preheat the oven to 400°F (200°C). This ensures a perfectly cooked chicken and tender vegetables.
Step 2: Chop the Chicken and Veggies
Cut the chicken breast and bell peppers into bite-sized pieces. The vibrant colors of the peppers will make your dish visually appealing and appetizing.
Step 3: Toss with Flavor
In a bowl, toss the chicken and bell peppers with olive oil, herbs, salt, and pepper. Make sure everything is well-coated to bring out those delightful flavors.
Step 4: Spread on the Sheet Pan
Spread the mixture evenly on a sheet pan. This allows for even cooking and ensures that all pieces receive direct heat.
Step 5: Bake to Perfection
Bake for 20-25 minutes, or until the chicken is cooked through and the vegetables are tender. Your kitchen will soon be filled with an inviting aroma that will have everyone gathering around.
Step 6: Warm the Pita Bread
Warm the pita bread in the oven during the last 5 minutes of cooking. This will enhance their texture and make them more pliable for stuffing.
Step 7: Assemble and Serve
Serve the chicken and peppers in the pita bread, drizzled with herbed ranch dressing. The creamy ranch will complement the savory flavor of the chicken and veggies perfectly.
Serving Suggestions & Pairings
These delightful pitas are great on their own, but you can elevate the experience by serving them with a side of crunchy coleslaw or a refreshing cucumber salad. The crispness of the vegetables will balance the warm pitas beautifully. For a complete meal, consider pairing with a light fruit smoothie to round out the flavors!
Storage & Leftovers Guide
If you have leftovers (which may be unlikely, given how delicious these pitas are!), store the chicken and bell pepper mixture in an airtight container in the refrigerator for up to 3 days. To reheat, simply warm in the oven or microwave until heated through. The pita breads can also be kept at room temperature for a few days, but are best enjoyed fresh.
Kitchen Wisdom & Success Tips
- Uniform Cutting: Ensure that your chicken and vegetables are cut into similar sizes for even cooking.
- Herb Choices: Feel free to experiment with different herbs based on what you have on hand—basil or rosemary can be a fantastic twist!
- Pita Bread Substitutes: If you’re looking to switch things up, try using flatbreads or wraps for a different texture.
- Meal Prep: Prepare a batch on the weekend and store them in the fridge for busy weeknight dinners.
Flavor Variations & Adaptations
Feel free to get creative! Add sliced olives for a briny kick, or sprinkle some feta cheese for that creamy, tangy element. If you’re looking to spice things up a bit, a pinch of chili flakes can add just the right amount of heat.
Reader Questions & Solutions
- Can I use frozen chicken? Yes! Just remember to fully thaw it before cooking for the best results.
- What can I substitute if I don’t have ranch dressing? Greek yogurt mixed with a bit of lemon juice and garlic is a great alternative.
- How do I know when the chicken is done? The chicken should reach an internal temperature of 165°F (75°C) for safe consumption.
- Can I add other vegetables? Absolutely! Zucchini or asparagus also work wonderfully in this dish.
- What if I don’t have a sheet pan? You can use any oven-safe dish; just ensure it has enough space for air to circulate around the chicken and veggies.
Wrapping Up
Cooking should be a joyful experience that brings families together, and I hope these Sheet Pan Chicken Pitas inspire you to gather around the dinner table. With every bite, you’re not just enjoying a meal; you’re nourishing your loved ones and creating memories. So, roll up those sleeves, and let’s get cooking! Happy eating!
PrintSheet Pan Chicken Pitas

A quick and nutritious meal featuring juicy chicken and colorful bell peppers, perfect for busy families.
- Prep Time: 10 minutes
- Cook Time: 25 minutes
- Total Time: 35 minutes
- Yield: 4 servings 1x
- Category: Main Course
- Method: Baking
- Cuisine: Mediterranean
- Diet: High Protein
Ingredients
- 1 pound chicken breast
- 2 bell peppers (red, green, yellow)
- 2 tablespoons olive oil
- 1 teaspoon herbs (such as oregano, thyme, and parsley)
- ½ cup ranch dressing
- 4 pita breads
- Salt, to taste
- Pepper, to taste
Instructions
- Preheat the oven to 400°F (200°C).
- Chop the chicken breast and bell peppers into bite-sized pieces.
- Toss the chicken and bell peppers with olive oil, herbs, salt, and pepper in a bowl.
- Spread the mixture evenly on a sheet pan.
- Bake for 20-25 minutes, or until the chicken is cooked through and the vegetables are tender.
- Warm the pita bread in the oven during the last 5 minutes of cooking.
- Assemble the chicken and peppers in the pita bread, drizzled with herbed ranch dressing.
Notes
For added flavor, feel free to use different herbs or add feta cheese. Leftovers can be stored in an airtight container for up to 3 days.
Nutrition
- Serving Size: 1 serving
- Calories: 350
- Sugar: 3g
- Sodium: 550mg
- Fat: 10g
- Saturated Fat: 1g
- Unsaturated Fat: 6g
- Trans Fat: 0g
- Carbohydrates: 34g
- Fiber: 4g
- Protein: 30g
- Cholesterol: 60mg