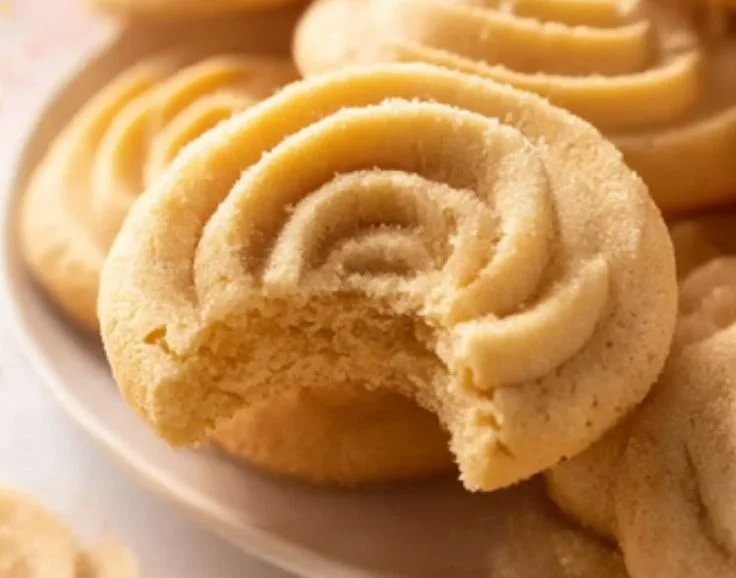
Creating my favorite cookies is a tradition that transforms any ordinary day into a special occasion, and there’s something undeniably magical about Classic Danish Butter Cookies. Each time I bake these delicate treats, I’m whisked away to my childhood, where the air would fill with the sweet, buttery aroma, and I would eagerly await the moment they came out of the oven. It was always a family affair—my little hands helping to shape the dough, while my mom sprinkled the colorful sugar on top. These cookies remind me of warm gatherings, laughter, and love shared over a simple yet delightful treat. Today, I’m excited to share this recipe with you, so you can create your own sweet memories.
Recipe Timing
- Prep Duration: 15 minutes
- Active Cooking: 15 minutes
- Total Duration: 30 minutes
- Portion Size: Makes about 24 cookies
- Complexity: Simple
Nutritional Recipe
- Calories per portion: Approximately 120
- Protein: 1 gram
- Carbs: 15 grams
- Fats: 6 grams
- Fiber: 0 grams
- Sugars: 5 grams
- Sodium: 40 mg
Why You’ll Love These Classic Danish Butter Cookies
What’s not to love about a cookie that defines comfort? The buttery richness of these Danish Butter Cookies melts in your mouth, creating a cookie experience that is both light and indulgent. With their simple ingredients, they are incredibly versatile, making them an ideal choice for any occasion—from afternoon tea to holiday gatherings. Plus, you can dress them up with colorful sugar or a drizzle of chocolate, allowing you to personalize them to your taste!
The Complete Cooking Journey
Picture this: You gather your ingredients, feeling the chill of the butter as you soften it with your hands, and your senses awaken with the sweet aroma of sugar as it mixes perfectly with the butter. As you fold in the flour, your kitchen fills with anticipation. You can already envision those perfectly shaped cookies dazzling with color, ready to delight friends and family. Follow along for a delightful baking experience that will fill your space with warmth and love.
Ingredients:
- 1 cup unsalted butter, softened
- 3/4 cup granulated sugar
- 2 cups all-purpose flour
- 1/2 teaspoon vanilla extract
- 1/4 teaspoon salt
- Optional: colored sugar or chocolate for decoration
Method:
Step 1: Preheat the Oven
Preheat your oven to 350°F (175°C) so it’s nice and hot when your cookies are ready to bake.
Step 2: Cream the Butter and Sugar
In a large bowl, cream together the softened butter and sugar until the mixture is light and fluffy. This process introduces air into the batter, giving your cookies that perfect texture.
Step 3: Add Vanilla Extract
Mix in the luscious vanilla extract, allowing its beautiful sweetness to blend with the butter and sugar—this is where the magic begins!
Step 4: Combine Flour and Salt
Gradually add the flour and salt into the bowl. Mix until just combined; over-mixing can make your cookies tough, and we want them to be delightfully tender!
Step 5: Shape the Dough
Using a cookie press or piping bag, shape the cookie dough into your desired forms on a baking sheet lined with parchment paper. The beauty of these cookies lies in their shapes—get creative!
Step 6: Garnish with Color
Sprinkle your shaped cookies with colorful sugar or add chocolate if desired. This not only enhances their aesthetic but adds a touch of sweetness to every bite.
Step 7: Bake to Perfection
Bake your cookies for 12-15 minutes or until the edges are lightly golden. Your kitchen will smell heavenly, a sweet prelude to the deliciousness that awaits!
Step 8: Cool and Enjoy
Let the cookies cool on the baking sheets for a few minutes before transferring them to a wire rack to cool completely. The anticipation builds as you await that first bite!
Serving Suggestions & Pairings
These Classic Danish Butter Cookies are perfect alongside a hot cup of tea or coffee. Consider serving them at your next gathering with a cheese platter and fresh fruit for a delightful contrast of flavors. They’re also a lovely addition to a homemade gift basket during the holidays!
Storage & Leftovers Guide
To keep your cookies fresh, store them in an airtight container at room temperature for up to one week. If you want to keep them longer, you can freeze the cookies for up to three months. Just let them thaw at room temperature when you’re ready to enjoy them again!
Kitchen Wisdom & Success Tips
- Ensure your butter is at room temperature for easier creaming; it should feel soft and pliable.
- If you don’t have a cookie press or piping bag, you can simply roll the dough into balls and flatten them slightly with your palm.
- Experiment with flavors by adding a pinch of cinnamon or a bit of almond extract to the dough for a delightful twist.
Flavor Variations & Adaptations
Feel free to jazz up these cookies with nuts, chocolate chips, or dried fruit for bursts of flavor. For a seasonal touch, try adding a zest of lemon or orange to the dough—perfect for spring gatherings!
Reader Questions & Solutions
-
Why are my cookies too flat?
- They may have too much butter or the butter was melted. Ensure your butter is softened, not melted, and measure accurately.
-
Can I use substitutes for the butter?
- Yes! You can use margarine or coconut oil, but the texture may vary slightly.
-
How can I make these cookies gluten-free?
- Use a 1-to-1 gluten-free flour blend, commonly available in stores; just ensure it includes xanthan gum for structure.
-
What can I do if my dough seems too dry?
- If the dough is too dry, try adding a splash of milk or water a teaspoon at a time until it reaches the desired consistency.
-
Can I press the dough ahead of time?
- Absolutely! You can shape the cookies, place them on a baking sheet, and freeze them. Just bake them straight from the freezer, adding a couple of extra minutes to the baking time.
Wrapping Up
Baking Classic Danish Butter Cookies is more than just following a recipe—it’s about relishing the process of creating something beautiful and delicious. As they emerge warm from the oven, you’ll find that the work is worth every moment as the tantalizing aroma fills your home. May your journey in baking be filled with joy, laughter, and memorable moments. So gather your loved ones, roll up your sleeves, and let’s get baking! Enjoy this timeless recipe and make it your own. Happy baking!
PrintClassic Danish Butter Cookies
Delicate and buttery cookies that melt in your mouth, perfect for any occasion.
- Prep Time: 15 minutes
- Cook Time: 15 minutes
- Total Time: 30 minutes
- Yield: Makes about 24 cookies 1x
- Category: Dessert
- Method: Baking
- Cuisine: Danish
- Diet: Vegetarian
Ingredients
- 1 cup unsalted butter, softened
- 3/4 cup granulated sugar
- 2 cups all-purpose flour
- 1/2 teaspoon vanilla extract
- 1/4 teaspoon salt
- Optional: colored sugar or chocolate for decoration
Instructions
- Preheat your oven to 350°F (175°C).
- Cream together the softened butter and sugar until light and fluffy.
- Mix in the vanilla extract.
- Gradually add the flour and salt, mixing until just combined.
- Using a cookie press or piping bag, shape the dough on a baking sheet lined with parchment paper.
- Sprinkle with colorful sugar or add chocolate if desired.
- Bake for 12-15 minutes or until the edges are lightly golden.
- Let cool on baking sheets before transferring to a wire rack.
Notes
Store in an airtight container at room temperature for up to one week; can be frozen for up to three months.
Nutrition
- Serving Size: 1 cookie
- Calories: 120
- Sugar: 5g
- Sodium: 40mg
- Fat: 6g
- Saturated Fat: 4g
- Unsaturated Fat: 2g
- Trans Fat: 0g
- Carbohydrates: 15g
- Fiber: 0g
- Protein: 1g
- Cholesterol: 30mg