As the sun begins to set and the day winds down, there’s something magical about treating yourself to a delightful dessert. Imagine walking into your kitchen, the warm glow of your oven lighting the space, and the rich, comforting aroma of chocolate embracing you like a cozy blanket. This is the moment I cherish, and today, it’s all about a dessert that embodies both elegance and a hint of nostalgia: the Hojicha Lava Cake.
Hojicha, a roasted green tea from Japan, is one of those ingredients that surprises and delights with its earthy flavors. When paired with the rich, melting chocolate of a lava cake, it transforms into a truly unforgettable experience. The first time I experienced this flavor combination, it was as if my taste buds awakened to something entirely new. Each bite of the gooey center showcases not just the luxurious chocolate but also the subtle, aromatic notes of hojicha, making it a dessert that dances on the palate.
It’s perfect for a special occasion or just because you deserve a moment of indulgence. Let’s make this alluring dessert together!
Recipe Timing
- Prep Duration: 15 minutes
- Active Cooking: 14 minutes
- Total Duration: 29 minutes
- Portion Size: Serves 4
- Complexity: Simple
Nutritional Recipe
- Calories per portion: Approximately 330 calories
- Protein: 6g
- Carbs: 33g
- Fats: 20g
- Fiber: 1g
- Sugars: 14g
- Sodium: 150mg
Why You’ll Love This Hojicha Lava Cake
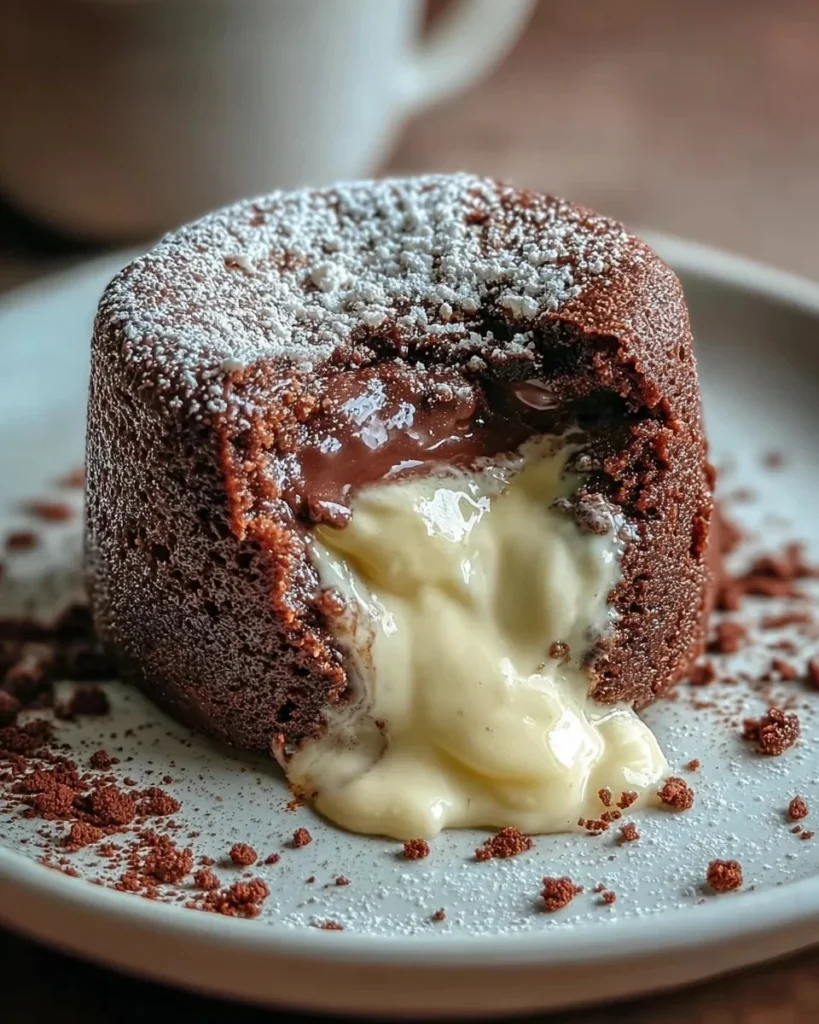
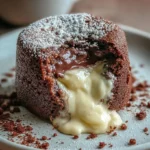
Hojicha Lava Cake is not your average chocolate dessert—it’s an experience. Imagine a beautiful, warm cake that holds a molten center, pairing beautifully with a scoop of vanilla ice cream. The depth of flavor from the hojicha adds an unexpected twist that will have your guests raving. Best of all, it’s deceptively easy to make, perfect for both novice and experienced bakers. This dessert will undoubtedly impress anyone lucky enough to dig into its luscious heart!
The Complete Cooking Journey
From mixing the batter to watching those little ramekins transform into golden treasures, each step fills your kitchen with delicious anticipation. The process is simple yet full of joy. Let’s dive into making Hojicha Lava Cake.
Ingredients:
- 1/2 cup unsalted butter
- 1 cup semisweet chocolate chips
- 1/4 cup hojicha powder
- 2 eggs
- 2 egg yolks
- 1/2 cup granulated sugar
- 1/2 cup all-purpose flour
- Pinch of salt
Method:
Step 1: Preheat the Oven
Preheat your oven to 425°F (220°C). While it’s warming up, take out four ramekins, generously grease them with butter, and dust them with flour to ensure easy removal later.
Step 2: Melt Butter and Chocolate
In a saucepan, melt the butter together with the chocolate chips over low heat. Stir constantly until the mixture is smooth and well combined. Then, take it off the heat and whisk in the hojicha powder, allowing its unique flavor to meld with the chocolate.
Step 3: Whisk Eggs and Sugar
In a mixing bowl, crack the eggs along with the additional yolks and add the granulated sugar. Whisk them together until the mixture turns pale and slightly thickened—you want a frothy, inviting base.
Step 4: Combine Chocolate Mixture with Eggs
Gradually pour the rich chocolate mixture into the egg and sugar blend, stirring continuously. It’s crucial to do this gradually to avoid cooking the eggs—you want a silky batter, not scrambled egg!
Step 5: Sift Flour and Salt
Next, sift in the all-purpose flour and add a pinch of salt. Mix gently until just combined, being careful not to overwork the batter—a few lumps are perfectly fine!
Step 6: Fill the Ramekins
Divide the batter among your prepared ramekins, filling each about three-quarters full. It’s essential not to overfill them, as they need room to rise.
Step 7: Bake to Perfection
Pop the ramekins into the preheated oven and bake for 12-14 minutes. You’re looking for firm edges and a soft, jiggly center—this is where the liquid chocolate magic happens.
Step 8: Cool and Serve
Once baked, let the ramekins cool for about a minute. Carefully invert each onto a serving plate. Serve immediately, perhaps with a scoop of ice cream or a dollop of whipped cream to enhance the experience.
Serving Suggestions & Pairings
This decadently rich cake pairs beautifully with a scoop of vanilla ice cream or a fluffy cloud of whipped cream. You can also consider fresh berries for a pop of color and tartness that balances the sweetness. A drizzle of caramel or a dusting of powdered sugar over the top adds an elegant touch.
Storage & Leftovers Guide
If you’re lucky enough to have leftovers (though I doubt it!), store the cooled cakes covered in the refrigerator for up to two days. To reheat, simply warm them in your microwave for a few seconds to revive that molten center.
Kitchen Wisdom & Success Tips
- Make sure your chocolate and butter are fully melted and combined for a smooth batter.
- Don’t skip dusting the ramekins with flour after greasing; it’s key for easy removal.
- Keep an eye on your cakes while they bake; every oven is a little different, and nobody likes overbaked lava!
Flavor Variations & Adaptations
Feel free to switch up the hojicha for matcha for a vibrant green tea flavor or even add a splash of an orange liqueur for a citrus twist. You can make these vegan by using aquafaba or silken tofu in place of eggs and swapping butter for coconut oil.
Reader Questions & Solutions
-
Q: Why did my lava cake not ooze?
A: It could be that you overbaked it. A gooey center needs careful timing! -
Q: How do I make sure the cakes come out of the ramekins easily?
A: Be generous with butter and flour on your ramekins—it makes all the difference! -
Q: Can I make the batter ahead of time?
A: Absolutely! You can prepare the batter in advance and refrigerate it. Just be sure to bring it back to room temperature before baking. -
Q: Is hojicha hard to find?
A: Not at all! Many Asian grocery stores or specialty shops carry it. You can also find it online. -
Q: How should I store the lava cakes?
A: Store in the fridge for up to two days and warm them before serving.
Wrapping Up
There you have it: a luxurious Hojicha Lava Cake ready to be whisked into your life! This simple yet indulgent treat is perfect for gathering friends or just enjoying a quiet moment to yourself. Embrace the art of baking, trust the process, and let the joys of flavor lead you to dessert bliss. Happy baking!
PrintHojicha Lava Cake
A luxurious dessert that combines the rich flavors of chocolate and earthy hojicha for a delightful lava cake experience.
- Prep Time: 15 minutes
- Cook Time: 14 minutes
- Total Time: 29 minutes
- Yield: 4 servings 1x
- Category: Dessert
- Method: Baking
- Cuisine: Japanese
- Diet: Vegetarian
Ingredients
- 1/2 cup unsalted butter
- 1 cup semisweet chocolate chips
- 1/4 cup hojicha powder
- 2 eggs
- 2 egg yolks
- 1/2 cup granulated sugar
- 1/2 cup all-purpose flour
- Pinch of salt
Instructions
- Preheat your oven to 425°F (220°C). Grease four ramekins with butter and dust with flour.
- Melt the butter and chocolate chips together in a saucepan over low heat, stirring until smooth. Remove from heat and whisk in hojicha powder.
- In a mixing bowl, whisk together eggs, egg yolks, and granulated sugar until pale and thick.
- Gradually add the chocolate mixture to the egg mixture, stirring continuously to avoid cooking the eggs.
- Sift in the flour and salt, mixing gently until just combined.
- Divide the batter among ramekins, filling each about three-quarters full.
- Bake for 12-14 minutes until edges are firm and centers jiggle.
- Cool briefly, then invert onto plates and serve immediately, optionally with ice cream or whipped cream.
Notes
Store any leftovers in the refrigerator for up to two days and reheat in the microwave before serving.
Nutrition
- Serving Size: 1 serving
- Calories: 330
- Sugar: 14g
- Sodium: 150mg
- Fat: 20g
- Saturated Fat: 10g
- Unsaturated Fat: 8g
- Trans Fat: 0g
- Carbohydrates: 33g
- Fiber: 1g
- Protein: 6g
- Cholesterol: 160mg