There’s something uniquely satisfying about dessert that requires no baking. Maybe it’s the anticipation that builds as the creamy delight chills in the fridge, or perhaps it’s the simplicity of preparing something delicious without the threat of a hot oven. When it comes to indulgent treats, these No-Bake Mini Biscoff Cheesecakes stand out, transporting you straight to cookie heaven with every smooth, velvety bite.
I’ll never forget the first time I tasted Biscoff cookies—delicately spiced, crispy, and downright addictive. It’s like they knew the secret to blissful pairing with creamy cheesecake. Ever since, I’ve been on a mission to create the perfect dessert that showcases the divine duo of Biscoff cookies and luscious cheesecake. These morsels not only satisfy your sweet tooth but also offer a beautiful presentation, making them perfect for gatherings or just a cozy night in.
Recipe Timing
- Prep Duration: 20 minutes
- Active Cooking: 10 minutes
- Total Duration: 4 hours 20 minutes (including chilling time)
- Portion Size: 12 mini cheesecakes
- Complexity: Simple
Nutritional Recipe
- Calories per portion: Approximately 250 calories
- Protein: 3g
- Carbs: 21g
- Fats: 19g
- Fiber: 0g
- Sugars: 10g
- Sodium: 115mg
Why You’ll Love This No-Bake Mini Biscoff Cheesecakes
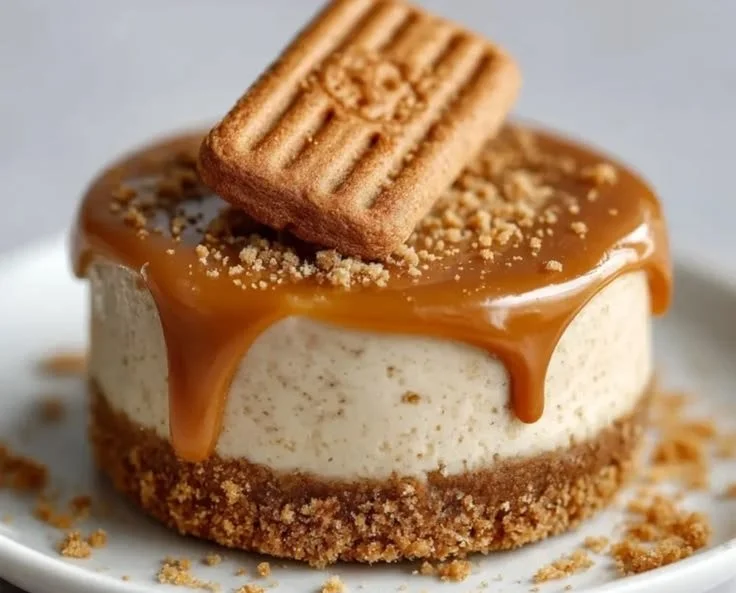
Imagine the rich, caramel notes of Biscoff cookies paired with smooth, luscious cheesecake. The beauty of these mini cheesecakes lies not just in their flavor but in their texture too. The buttery Biscoff crust provides the perfect crunchy base, while the silky cream cheese filling melts in your mouth, dancing on your palate. Drizzling them with warm cookie butter adds an extra layer of indulgence—trust me, your friends and family will be clamoring for the recipe after the first bite!
The Complete Cooking Journey
Baking shouldn’t always mean heating the oven! Embrace the ease and fun of no-bake desserts with these delightful Biscoff cheesecakes. Each bite is a reminder that deliciousness doesn’t require complicated techniques or lengthy bake times—just pure enjoyment and simple ingredients.
Ingredients:
- 24 Lotus Biscoff cookies (plus extra for topping)
- 4 tablespoons unsalted butter, melted
- 8 oz cream cheese, softened
- 1/2 cup powdered sugar
- 1 teaspoon vanilla extract
- 1 cup heavy cream
- 1/4 cup melted Biscoff cookie butter
Method:
Step 1: Prepare the Crust
Crush the Biscoff cookies and mix with melted butter to form the crust. Press the mixture into the bottom of mini cheesecake pans, ensuring an even layer.
Step 2: Combine Cream Cheese Mixture
In a bowl, beat the cream cheese, powdered sugar, and vanilla extract until smooth. You want it creamy and fluffy.
Step 3: Whip the Cream
In a separate bowl, whip the heavy cream until stiff peaks form, which will give your cheesecake a light, airy texture.
Step 4: Fold and Fill
Gently fold the whipped cream into the cream cheese mixture until fully combined. Spoon the cream cheese filling onto the crusts and smooth the tops with a spatula.
Step 5: Add the Finishing Touches
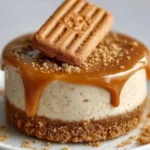
Drizzle melted Biscoff cookie butter on top and place a whole Biscoff cookie for garnish, adding an eye-catching element to your beautiful dessert.
Step 6: Chill and Set
Refrigerate for at least 4 hours before serving. This helps the flavours meld beautifully and gives the cheesecake its proper texture.
Serving Suggestions & Pairings
These mini cheesecakes shine when served chilled, ideally with a cup of coffee or tea. Their creamy richness contrasts beautifully with a hot beverage, creating a delightful balance. You might even consider serving them with fresh berries or a berry compote for a pop of color and tartness.
Storage & Leftovers Guide
If you’re lucky enough to have leftovers (which I doubt!), store these cheesecakes in an airtight container in the refrigerator for up to 3 days. Just be mindful of the toppings as you store them; it’s best to keep them separate to avoid sogginess.
Kitchen Wisdom & Success Tips
- Make sure your cream cheese is room temperature for easy mixing. No one wants lumps in their cheesecake!
- Don’t skip the chilling time—it’s crucial for achieving the right texture.
- For an easier cleanup, use disposable mini cheesecake pans or liners.
Flavor Variations & Adaptations
Want to switch it up? Try adding a hint of espresso to the cream cheese filling for mocha-flavored cheesecakes, or swirl in some chocolate ganache for a dessert that’s truly decadent. The options are limitless!
Reader Questions & Solutions
-
Can I use a different type of cookie for the crust?
- Absolutely! Any crunchy cookie will work, but adjust the butter quantity according to the cookie’s texture.
-
What if I don’t have heavy cream?
- You can substitute a whisked version of whipped topping, but keep in mind it changes the flavor and richness.
-
How do I know when the cheesecakes are set?
- They should be firm to the touch but slightly springy. If they transfer gently with no jiggle, you’re all set!
-
Can I freeze these cheesecakes?
- Yes! Wrap them tightly in plastic wrap and freeze for up to a month. Thaw in the fridge before serving.
-
What can I use as a dairy-free alternative?
- Look for vegan cream cheese and a non-dairy whipping cream. Be sure to check if they are suitable substitutes for your taste.
Wrapping Up
Nothing beats the satisfaction of a delightful dessert expertly crafted from simple ingredients. These No-Bake Mini Biscoff Cheesecakes offer just that, serving not only as a sweet ending to your meals but also as a lovely treat to enjoy any time. So grab some Biscoff cookies, get mixing, and indulge in this creamy goodness that will surely make your heart (and stomach!) sing. Happy baking—err, no-baking!
PrintNo-Bake Mini Biscoff Cheesecakes
Delight in these No-Bake Mini Biscoff Cheesecakes, featuring a buttery Biscoff crust and creamy cheesecake filling, perfect for any occasion without the need for an oven.
- Prep Time: 20 minutes
- Cook Time: 10 minutes
- Total Time: 260 minutes
- Yield: 12 mini cheesecakes 1x
- Category: Dessert
- Method: No-Bake
- Cuisine: American
- Diet: Vegetarian
Ingredients
- 24 Lotus Biscoff cookies (plus extra for topping)
- 4 tablespoons unsalted butter, melted
- 8 oz cream cheese, softened
- 1/2 cup powdered sugar
- 1 teaspoon vanilla extract
- 1 cup heavy cream
- 1/4 cup melted Biscoff cookie butter
Instructions
- Prepare the Crust: Crush the Biscoff cookies and mix with melted butter to form the crust. Press the mixture into the bottom of mini cheesecake pans, ensuring an even layer.
- Combine Cream Cheese Mixture: In a bowl, beat the cream cheese, powdered sugar, and vanilla extract until smooth. You want it creamy and fluffy.
- Whip the Cream: In a separate bowl, whip the heavy cream until stiff peaks form, which will give your cheesecake a light, airy texture.
- Fold and Fill: Gently fold the whipped cream into the cream cheese mixture until fully combined. Spoon the cream cheese filling onto the crusts and smooth the tops with a spatula.
- Add the Finishing Touches: Drizzle melted Biscoff cookie butter on top and place a whole Biscoff cookie for garnish, adding an eye-catching element to your beautiful dessert.
- Chill and Set: Refrigerate for at least 4 hours before serving. This helps the flavours meld beautifully and gives the cheesecake its proper texture.
Notes
Make sure your cream cheese is room temperature for easy mixing. Don’t skip the chilling time—it’s crucial for achieving the right texture.
Nutrition
- Serving Size: 1 mini cheesecake
- Calories: 250
- Sugar: 10g
- Sodium: 115mg
- Fat: 19g
- Saturated Fat: 11g
- Unsaturated Fat: 6g
- Trans Fat: 0g
- Carbohydrates: 21g
- Fiber: 0g
- Protein: 3g
- Cholesterol: 40mg