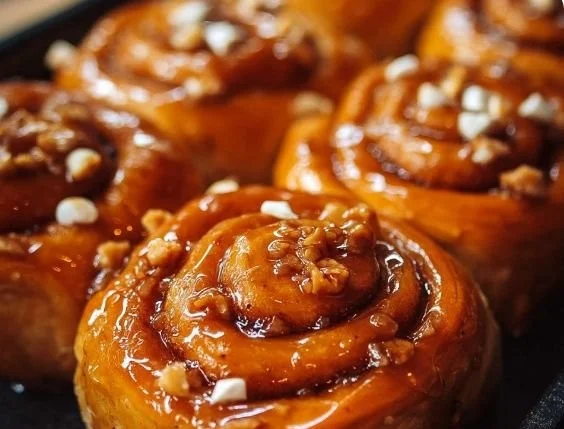
There’s something undeniably comforting about the smell of freshly baked bread wafting through the kitchen. It wraps around you like a warm hug, inviting you to come closer and take a bite. This is the magic that happens with Sweet and Sticky Homemade Honey Buns. These delightful treats aren’t just delicious—they’re laced with nostalgia, bringing back memories of family gatherings, lazy Sunday brunches, and the simple pleasure of enjoying a sweet bite with a cup of coffee or tea.
This recipe is not just about following steps; it’s about creating a moment, a memory, and a sense of joy that you can share with those you love. I remember the first time I made these with my little niece, her eyes wide with wonder as the dough transformed from a simple mix of ingredients into plump, golden rolls. Together, we drizzled warm honey over them, watching as it pooled into the nooks and crannies. If you’ve never tried making these at home, it’s time to roll up those sleeves and start your baking adventure!
Recipe Timing
- Prep Duration: 15 minutes
- Active Cooking: 25 minutes
- Total Duration: 2 hours (including rising time)
- Portion Size: Serves 12
- Complexity: Simple
Nutritional Recipe
- Calories per portion: 190
- Protein: 3g
- Carbs: 30g
- Fats: 7g
- Fiber: 1g
- Sugars: 8g
- Sodium: 150mg
Why You’ll Love This Sweet and Sticky Homemade Honey Buns
These honey buns are the perfect blend of soft, fluffy dough and sweet stickiness that makes every bite feel like a little indulgence. With their golden tops and warm interiors, they greet you with a sweet aroma that beckons you to enjoy just one more. Perfect for breakfast, a snack, or even as a delightful dessert, they are versatile enough to grace any occasion. Plus, the joy of sharing something homemade with friends and family amplifies the fantastic flavors they deliver.
The Complete Cooking Journey
Get ready to embark on a delightful baking journey! The process is straightforward and rewarding—watch as your simple ingredients transform into a batch of irresistible honey buns. You’ll whisk, mix, knead, rise, bake, and then indulge—what could be more satisfying?
Ingredients:
- 2 cups all-purpose flour (plus extra for dusting)
- 1/2 cup milk (warm) (Make sure the milk is at a warm temperature to activate the yeast)
- 1/4 cup honey (plus extra for drizzling)
- 1/4 cup unsalted butter (melted) (Substitutions: use olive oil or margarine if out of butter)
- 1/4 cup sugar
- 1 packet instant yeast (2 1/4 tsp)
- 1/4 tsp salt
- 1 large egg
Method:
Step 1: Warm the Milk
Begin by gently warming your milk. It should be comfortably warm, like a cozy blanket, but not so hot that it scalds. This step is crucial because warm milk activates the yeast, ensuring those deliciously fluffy buns.
Step 2: Combine the Ingredients
In a large mixing bowl, combine your warm milk, sugar, honey, melted butter, and the egg. Stir until everything is well incorporated and feels like a sweet embrace.
Step 3: Mix in Dry Ingredients
Now, add the flour, yeast, and salt to your wet mixture. Start stirring it together until it forms a shaggy dough. Use your hands if you need to get in there and embrace the mix fully!
Step 4: Knead the Dough
Transfer your dough to a floured surface and knead it for about 5 minutes. This step is like giving your dough a little massage to make it smooth and elastic. It should feel soft and slightly tacky, but not sticky.
Step 5: First Rise
Place the kneaded dough in a lightly greased bowl, cover it with a kitchen towel, and let it rise in a warm spot for about 1 hour or until it has doubled in size. Take a moment to enjoy the aroma filling your kitchen.
Step 6: Shape the Honey Buns
Once the dough has risen, punch it down gently to release some air. Roll it out into a rectangle and cut it into equal squares. Roll each square into little balls and place them in a greased baking dish, allowing some space in between.
Step 7: Second Rise
Cover the dish again and let the buns rise for another 30 minutes. This final rise will ensure they are fluffy and pillowy after baking.
Step 8: Bake to Perfection
Preheat your oven to 350°F (175°C). Once the buns have risen, pop them into the oven and allow them to bake for 25 minutes, until golden brown and smelling heavenly.
Step 9: Drizzle with Honey
After removing from the oven, let them cool for about 10 minutes before drizzling with extra honey. This adds that beautiful sticky finish that makes these buns irresistibly delicious!
Serving Suggestions & Pairings
These honey buns are a treat on their own, but they pair wonderfully with a side of fresh fruit for breakfast or a dollop of whipped cream for dessert. Try serving them alongside a warm cup of coffee or tea to elevate your experience or for a special brunch, serve with a fruit compote or yogurt.
Storage & Leftovers Guide
Store any leftovers in an airtight container at room temperature for up to 2 days. For longer preservation, you can freeze them for up to a month. Just make sure to reheat in the oven for that fresh-out-of-the-oven taste!
Kitchen Wisdom & Success Tips
- Ensure your yeast is fresh—if it doesn’t foam in warm milk, it’s time for a new packet.
- Kneading not only blends ingredients but also develops gluten, which gives your buns their structure.
- If you’re in a rush, you can place your dough in a slightly warm oven (turned off) to speed up the rising process.
Flavor Variations & Adaptations
Feel free to add a dash of cinnamon for warmth or some chocolate chips for a sweet twist! You can also substitute the honey for maple syrup or agave for a different flavor profile.
Reader Questions & Solutions
-
Why didn’t my dough rise?
Ensure your yeast is fresh and that your warm milk is not too hot or cold. A warm, humid environment can help in rising. -
Can I prepare the dough ahead of time?
Absolutely! You can make the dough in advance, let it rise once, shape it, then refrigerate overnight. Just allow it to sit at room temperature for about 30 minutes before baking. -
How can I make these gluten-free?
Substitute the all-purpose flour with a well-blended gluten-free flour mix and add a bit of xanthan gum for structure. -
What if I’m out of honey?
You can use brown sugar or maple syrup as a substitute, although this may slightly alter the flavor and texture. -
Can I bake these in advance and reheat later?
Yes! Bake them, let them cool completely, then store them. Reheat them in a preheated oven before serving for that fresh-baked flavor.
Wrapping Up
Sweet and Sticky Homemade Honey Buns are not just a recipe; they’re an invitation to create joyful moments in the kitchen and delightful memories around the table. The process is simple, the results are heartwarming, and the flavors are simply unbeatable. So, roll up those sleeves, gather your loved ones, and make some magic happen in your kitchen. Enjoy every sticky, sweet bite!
PrintSweet and Sticky Homemade Honey Buns

Delicious homemade honey buns that are soft, fluffy, and sweet, perfect for breakfast or dessert.
- Prep Time: 15 minutes
- Cook Time: 25 minutes
- Total Time: 120 minutes
- Yield: 12 servings 1x
- Category: Breakfast
- Method: Baking
- Cuisine: American
- Diet: Vegetarian
Ingredients
- 2 cups all-purpose flour (plus extra for dusting)
- 1/2 cup warm milk
- 1/4 cup honey (plus extra for drizzling)
- 1/4 cup unsalted butter (melted)
- 1/4 cup sugar
- 1 packet instant yeast (2 1/4 tsp)
- 1/4 tsp salt
- 1 large egg
Instructions
- Warm the milk.
- Combine the warm milk, sugar, honey, melted butter, and egg in a large mixing bowl.
- Mix in the flour, yeast, and salt.
- Knead the dough on a floured surface for about 5 minutes.
- Place the dough in a greased bowl, cover, and let it rise for about 1 hour.
- Punch down the risen dough, roll it out, and cut into squares.
- Cover the rolled balls and let them rise for another 30 minutes.
- Preheat oven to 350°F (175°C) and bake the buns for 25 minutes.
- Drizzle with extra honey after cooling for about 10 minutes.
Notes
Serve with coffee or tea for a delightful experience. Store leftovers in an airtight container for up to 2 days or freeze for a month.
Nutrition
- Serving Size: 1 serving
- Calories: 190
- Sugar: 8g
- Sodium: 150mg
- Fat: 7g
- Saturated Fat: 4g
- Unsaturated Fat: 2g
- Trans Fat: 0g
- Carbohydrates: 30g
- Fiber: 1g
- Protein: 3g
- Cholesterol: 30mg